0
2026 ARTCILUX.
0
Our News

12V vs 24V LED Driver for Cabinet Lighting: Wattage, Voltage Drop, Dimming and Safety

Table of Content [Hide]

    For most cabinet lighting projects, a 12V LED driver is suitable for compact furniture, short cable distances and lighting products already designed around a 12V platform. A 24V LED driver is often the better choice for longer linear lighting runs, larger wardrobes, multi-cabinet kitchens and systems with greater distance between the driver and the lights. At the same wattage, a 24V system draws approximately half the current of a 12V system, which can reduce voltage drop and cable losses.

    Voltage alone, however, does not determine whether a cabinet lighting system will perform reliably. Buyers and installers must also calculate the total wattage, check the driver load margin, confirm dimming compatibility, select suitable cables and connectors, plan ventilation and verify the safety requirements of the target market.

    This guide explains how cabinet manufacturers, lighting designers, contractors and OEM buyers can select between a 12V and 24V LED driver for cabinet lighting.

    12V vs 24V LED Driver: Quick Comparison

    Comparison12V LED Driver24V LED Driver
    Typical applicationSmall cabinets, short shelves, compact furniture and short cable runsLong wardrobes, kitchen cabinet systems, long shelves and multi-zone installations
    Current at the same wattageHigherApproximately half the current of a 12V system
    Voltage drop over distanceMore noticeable under the same load and cable conditionsGenerally easier to manage over longer cable distances
    Minimum cutting lengthSome 12V LED strips offer shorter cutting intervalsSome 24V LED strips have longer cutting intervals
    Suitable project scaleSmall or highly segmented furniture lightingMedium and large integrated furniture lighting systems
    Driver and component compatibilityRequires 12V lights, sensors and controllersRequires 24V lights, sensors and controllers
    Best reason to chooseExisting 12V platform or compact product designLower current and better performance across longer runs

    The most important rule is simple: the output voltage of the LED driver must match the rated voltage of the cabinet lights and downstream control components. Never connect a 12V light directly to a 24V driver.

    Artcilux provides cabinet LED drivers and power supplies with 12V and 24V output options for integrated furniture lighting systems.

    What Does an LED Driver Do in Cabinet Lighting?

    An LED driver converts the building's mains electricity into the low-voltage DC output required by cabinet lights. In a typical furniture lighting system, it sits between the mains supply and the lights, sensors or controllers.

    A common system layout is:

    AC mains input → LED driver → sensor or controller → distribution ports → cabinet lights

    Depending on the product design, the driver may also provide:

    • Multiple fixture output ports

    • A dedicated switch or control port

    • PWM dimming compatibility

    • Short-circuit protection

    • Overload protection

    • Over-temperature protection

    • Over-voltage protection

    • Reverse-polarity protection

    • Wireless or smart control integration

    A cabinet LED driver should therefore be selected as part of the complete lighting system rather than as an isolated electrical component.

    How Do You Choose Between a 12V and 24V LED Driver?

    Start with the voltage marked on the LED light. A 12V cabinet light requires a regulated 12V DC output, while a 24V cabinet light requires a regulated 24V DC output.

    When both voltage versions are available, consider the following project conditions.

    Choose a 12V LED Driver When:

    • The selected cabinet lights are rated for 12V DC.

    • The lighting runs and cable distances are short.

    • The furniture contains many small lighting segments.

    • The existing product platform already uses 12V connectors, sensors and controllers.

    • A specific 12V LED strip provides the cutting interval required by the furniture dimensions.

    • The driver can be installed close to the connected lights.

    Choose a 24V LED Driver When:

    • The selected cabinet lights are rated for 24V DC.

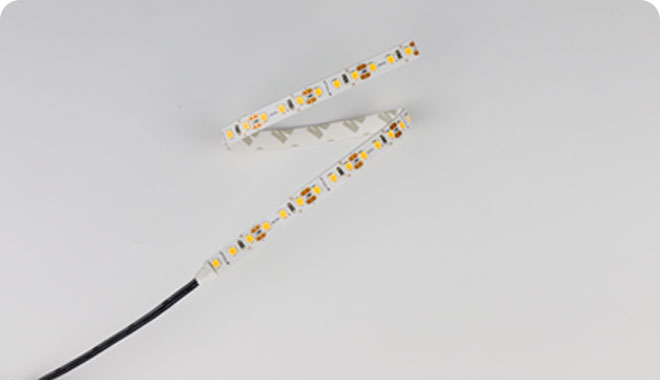
    • The project includes long linear lights or LED strips.

    • One driver must supply several cabinets or lighting branches.

    • The driver is located some distance from the lights.

    • The project requires lower current through cables, connectors and controllers.

    • Reducing visible brightness loss across long runs is a priority.

    For large kitchen, wardrobe and whole-house furniture projects, 24V can simplify power distribution. For small cabinets and compact standalone products, 12V may remain practical and cost-effective.

    Why Does a 24V System Draw Less Current?

    Electrical power is calculated using the following relationship:

    Power (W) = Voltage (V) × Current (A)

    The required current can therefore be calculated as:

    Current (A) = Power (W) ÷ Voltage (V)

    For a 60W cabinet lighting load:

    • At 12V: 60W ÷ 12V = 5A

    • At 24V: 60W ÷ 24V = 2.5A

    The 24V system delivers the same nominal power while carrying half the current. Lower current can reduce losses in the cables and place less electrical demand on connectors, distribution ports and control components.

    Total Lighting LoadCurrent at 12VCurrent at 24V
    12W1A0.5A
    24W2A1A
    36W3A1.5A
    60W5A2.5A
    100W8.33A4.17A
    120W10A5A

    These calculations show the theoretical current required by the lighting load. The driver, cable, connector, controller and sensor ratings must still be checked individually.

    How to Calculate the Required LED Driver Wattage

    An LED driver should not be selected only by voltage. Its rated output power must also be sufficient for all connected cabinet lights.

    Step 1: Calculate the Total Lighting Load

    For individual fixtures:

    Total load = wattage per fixture × number of fixtures

    For LED strip lighting:

    Total load = wattage per meter × installed length

    If the system contains several fixture types, calculate each group separately and add them together.

    Step 2: Include Controllers and System Configuration

    Check whether the project includes:

    • Door, PIR, touch or hand-wave sensors

    • Wireless receivers

    • PWM dimming controllers

    • CCT controllers

    • Distribution boxes

    • Illuminated switches or other control accessories

    The main lighting load usually represents most of the power requirement, but every component must remain within its voltage and current rating.

    Step 3: Add a Suitable Driver Capacity Margin

    Operating a driver continuously at its maximum rated output may reduce the available margin for temperature, manufacturing tolerances, wiring losses and future system changes.

    For Artcilux cabinet power supply selection, a reserve of approximately 20% to 30% above the calculated LED load can be used as a general starting point. The final margin should follow the exact driver datasheet and project conditions.

    Recommended driver power = total LED load × 1.20 to 1.30

    Example 1: Cabinet Spotlights

    A display cabinet uses eight 3W spotlights:

    • Total load: 8 × 3W = 24W

    • With a 25% margin: 24W × 1.25 = 30W

    • Possible selection: the next compatible standard driver size above 30W

    Example 2: Kitchen Linear Lighting

    A kitchen contains six linear lights rated at 7W each:

    • Total load: 6 × 7W = 42W

    • With a 25% margin: 42W × 1.25 = 52.5W

    • Possible selection: a compatible 60W driver

    Example 3: LED Strip Lighting

    A wardrobe uses 7 meters of LED strip rated at 9.6W per meter:

    • Total load: 7 × 9.6W = 67.2W

    • With a 25% margin: 67.2W × 1.25 = 84W

    • Possible selection: a compatible driver rated above 84W

    Do not select a larger driver without also checking the maximum current ratings of the output ports, connectors, sensors and controllers.

    What Is Voltage Drop in Cabinet Lighting?

    Voltage drop is the reduction in voltage between the LED driver and the cabinet light. It occurs because cables, connectors and circuit-board conductors have electrical resistance.

    A simplified calculation is:

    Voltage drop = current × total circuit resistance

    Voltage drop increases when:

    • The current is higher.

    • The cable is longer.

    • The conductor is smaller.

    • The connector resistance is higher.

    • Too many lights share one cable branch.

    • The installation includes loose or poor-quality connections.

    In cabinet lighting, excessive voltage drop can cause:

    • Lights at the end of a run to appear dimmer

    • Uneven brightness between cabinet sections

    • Color changes across long LED strips

    • Unstable sensor or controller operation

    • Increased heating at cables or connectors

    • Failure of the system to reach its specified output

    Why Does 24V Usually Reduce Voltage Drop?

    At the same wattage, a 24V lighting system carries half the current of a 12V system. Because voltage drop is directly related to current, reducing the current also reduces the voltage lost across the same cable resistance.

    Consider an illustrative 60W system with a total cable-circuit resistance of 0.2 ohms:

    12V Example

    • Current: 60W ÷ 12V = 5A

    • Voltage drop: 5A × 0.2 ohms = 1V

    • Percentage drop: 1V ÷ 12V = approximately 8.3%

    24V Example

    • Current: 60W ÷ 24V = 2.5A

    • Voltage drop: 2.5A × 0.2 ohms = 0.5V

    • Percentage drop: 0.5V ÷ 24V = approximately 2.1%

    This example is for comparison only. Real voltage drop depends on the cable material, conductor size, one-way distance, return path, connector resistance, load distribution and LED product design.

    How Much Voltage Drop Is Acceptable?

    There is no single percentage that applies to every cabinet lighting product. Many low-voltage lighting designers use approximately 3% as a practical design target, but the acceptable limit should be determined by the light manufacturer's requirements and the visual performance of the finished installation.

    Even when a light still operates, a visible brightness difference may be unacceptable in a premium kitchen, display cabinet or wardrobe. For this reason, voltage-drop planning should consider visual consistency rather than only whether the light turns on.

    How to Reduce Voltage Drop in Cabinet Lighting

    1. Use a 24V System for Longer Runs

    When suitable 24V lights and control components are available, a 24V platform can reduce current and simplify longer power-distribution routes.

    2. Install the Driver Closer to the Lights

    A centrally positioned driver can shorten the longest cable branch. In a large kitchen, it may be better to place the driver above a central cabinet rather than at one extreme end of the installation.

    3. Divide the Project into Parallel Branches

    Instead of sending the entire load through one long cable or continuous strip, divide the system into shorter parallel lighting branches.

    For example:

    Driver → distribution port → left cabinet branch, center cabinet branch and right cabinet branch

    Each branch should receive the correct system voltage and remain within the output-port rating.

    4. Select an Appropriate Cable Size

    Long cable runs and high-current loads may require a larger conductor. Cable selection should consider:

    • System voltage

    • Total load current

    • One-way cable distance

    • Permitted voltage drop

    • Ambient temperature

    • Installation method

    • Local code requirements

    5. Avoid Unnecessary Connectors

    Every connector adds a small amount of resistance. Use reliable, correctly rated connectors and avoid creating multiple unnecessary joints between the driver and the light.

    6. Use Power Injection Where Permitted

    Long LED strip installations may be supplied from both ends or at multiple points if the product manufacturer permits that wiring method. Power injection should be designed carefully to maintain correct polarity and prevent incompatible power sources from being connected together.

    7. Use Multiple Drivers for Large Projects

    One very large central driver is not always the best solution. Multiple drivers can shorten cable routes, separate lighting zones and simplify future maintenance.

    Constant-Voltage vs Constant-Current LED Drivers

    Most modular cabinet lights and flexible LED strips are designed for a constant-voltage supply such as 12V DC or 24V DC. The light contains the components required to regulate current within its intended operating design.

    A constant-current driver, by contrast, regulates the output current and allows the voltage to vary within a specified range. It is commonly used with LED modules designed around a defined current rather than a fixed input voltage.

    Driver TypeOutput CharacteristicTypical Cabinet Application
    Constant-voltage driverFixed 12V or 24V DC outputLED strips, cabinet spotlights, linear lights and modular furniture lighting
    Constant-current driverFixed output current within a permitted voltage rangeSpecific LED modules engineered for constant-current operation

    Do not replace one type with the other unless the light manufacturer confirms compatibility.

    How Does Dimming Work with a 12V or 24V LED Driver?

    A driver being rated for 12V or 24V does not automatically mean it is dimmable. Dimming requires compatibility between the driver, controller, sensor and LED light.

    Low-Voltage PWM Dimming

    Pulse-width modulation, or PWM, controls perceived brightness by switching the DC output to the LED load on and off rapidly. Changing the proportion of on-time to off-time changes the average light output.

    A typical PWM cabinet lighting system is:

    Constant-voltage driver → PWM controller → 12V or 24V cabinet lights

    Artcilux offers 12V/24V PWM lighting controllers for compatible intelligent cabinet lighting systems.

    When selecting a PWM controller, confirm:

    • Operating voltage

    • Total load current

    • Maximum current per output port

    • PWM frequency

    • Single-color or tunable-white output

    • Sensor and wireless transmitter compatibility

    • Minimum and maximum brightness settings

    For cabinets used in photography studios, retail displays or video backgrounds, the PWM frequency should also be reviewed because some control frequencies can create visible banding on camera.

    Touch Dimming

    Some touch sensors combine switching and PWM dimming. A short touch may turn the lights on or off, while a long touch adjusts brightness.

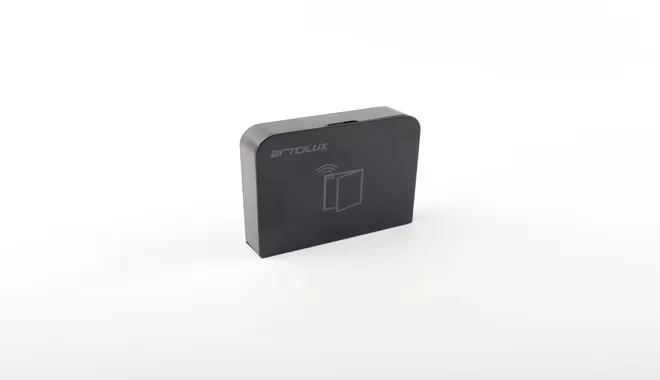
    Artcilux's single and dual touch sensor switches support compatible 12V and 24V furniture lighting systems. The connected load must remain within the sensor's rated power.

    AC Phase-Cut Dimming

    Some LED drivers accept a leading-edge or trailing-edge dimmer on the AC input side. This approach is common in architectural lighting but requires a driver specifically designed for the selected dimming method.

    Do not install an ordinary wall dimmer in front of a non-dimmable driver. Incompatible combinations may cause:

    • Flicker

    • Buzzing

    • Limited dimming range

    • Failure to turn off completely

    • Driver overheating

    • Premature component failure

    0–10V, DALI and Smart Control

    Commercial millwork and larger interior projects may use 0–10V, DALI, Tuya or another building-control platform. These projects require compatible drivers, controllers, gateways and commissioning procedures.

    Artcilux's S1361.DIM.1H dimming controller supports 12V/24V operation, 2.4GHz communication and smart lighting control for compatible cabinet systems.

    Single-Color vs Tunable-White Driver and Controller Requirements

    A single-color cabinet light generally uses one positive and one negative output path. A tunable-white or CCT-adjustable light normally uses separate warm-white and cool-white channels.

    A tunable-white system therefore requires:

    • A compatible CCT LED light

    • A suitable 12V or 24V power supply

    • A dual-channel CCT controller

    • Correctly matched connectors and cables

    • A compatible wall switch, remote control, sensor or mobile application

    A standard single-channel dimmer can adjust brightness but cannot independently blend warm and cool LED channels unless it is specifically designed for CCT control.

    How Many Cabinet Lights Can One LED Driver Power?

    The quantity depends on the wattage of each light, the total driver capacity, the load margin and the ratings of individual output ports.

    For example, a 60W driver should not automatically be connected to twenty 3W lights, because that would create a calculated load of exactly 60W with no remaining capacity margin.

    Using a 25% design margin:

    Recommended continuous LED load = driver wattage ÷ 1.25

    For a 60W driver:

    60W ÷ 1.25 = 48W recommended calculated LED load

    If each cabinet light is rated at 3W:

    48W ÷ 3W = 16 lights

    This is a simplified power-budget example. The final quantity must also comply with the rated current of each output port, connector, controller and sensor.

    Multi-Port vs Single-Output Cabinet LED Drivers

    A conventional LED driver may provide one DC output cable that connects to a separate distribution box. A furniture-specific multi-port driver can integrate several fixture outputs and a dedicated control connection.

    Advantages of Multi-Port Cabinet Drivers

    • Faster plug-and-play cabinet assembly

    • Reduced need for separate splitters

    • More consistent wiring between furniture models

    • Easier replacement during after-sales service

    • Dedicated ports for switches or controllers

    • Cleaner cable organization inside furniture

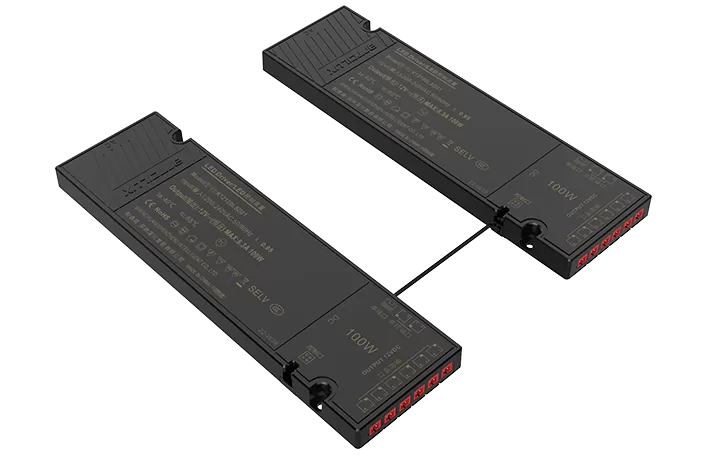
    The Artcilux LSD01 intelligent ultra-thin power supply provides several 12V and 24V configurations from 24W to 120W, with multiple fixture ports and one switch port.

    The SEA intelligent ultra-thin power supply provides 24W, 36W and 60W options with 12V/24V variants and integrated fixture and switch ports.

    Where Should a Cabinet LED Driver Be Installed?

    The driver should be hidden from normal view but accessible for installation, inspection and replacement.

    Possible locations include:

    • Above kitchen wall cabinets

    • Inside a ventilated service compartment

    • Behind a removable cabinet panel

    • Above a wardrobe

    • Inside a technical cabinet

    • Near an accessible electrical outlet

    Avoid installing the driver:

    • Directly beside a sink or water pipe

    • Inside an unventilated cavity not approved by the manufacturer

    • Against an oven, cooktop or other heat source

    • Where clothing or stored products completely cover it

    • Where it cannot be accessed without destroying the cabinet

    • Where cables can be damaged by hinges or drawer runners

    Ultra-thin furniture drivers can simplify concealed installation, but their dimensions, mounting clearance and ventilation requirements must still be included in the cabinet drawings.

    LED Driver Safety Requirements for Cabinet Lighting

    Match the Input Voltage

    Confirm that the driver accepts the mains voltage and frequency used in the destination country. A driver designed only for 200–240V input should not be used on a 100–120V supply unless the datasheet explicitly supports that range.

    Match the Output Voltage

    A 24V driver can damage a 12V cabinet light. A 12V driver connected to a 24V light may result in no output, low brightness or unstable operation.

    Check the Protection Functions

    Depending on the product and target application, useful protection functions include:

    • Short-circuit protection

    • Overload protection

    • Over-temperature protection

    • Over-voltage protection

    • Reverse-polarity protection

    Protection functions reduce risk but do not replace correct system design, cable selection or installation.

    Check the IP Rating

    An IP20 driver is generally intended for dry indoor locations and does not provide protection against water. Bathroom, vanity, outdoor and humid-area projects require a full review of the driver's location, enclosure and applicable local requirements.

    Confirm Market-Specific Certification

    Certification requirements vary by destination and project type. Buyers may need to verify relevant documentation for:

    • North America

    • European Union

    • United Kingdom

    • Australia and New Zealand

    • Middle East markets

    • Commercial or hospitality projects

    Do not assume that every 12V or 24V power supply qualifies as a Class 2 power source. Class 2 status depends on defined power-limiting requirements and the certification or listing of the actual equipment.

    Use a Qualified Electrician for Mains Connections

    Low-voltage cabinet lights may use plug-and-play connectors, but mains-voltage wiring and hardwired driver installation should be completed by a qualified electrician in accordance with local electrical regulations.

    Keep Drivers Accessible

    A driver is a serviceable electrical component. Do not permanently seal it behind a finished wall or cabinet panel unless the installation method and product documentation explicitly permit this arrangement.

    Common LED Driver Problems and Troubleshooting

    ProblemPossible CauseWhat to Check
    Cabinet lights do not turn onNo AC input, reversed polarity, incorrect output voltage or loose connectorMains input, driver output, polarity, connectors and switch status
    Lights flickerDriver overload, incompatible dimmer or unstable connectionTotal load, dimming method, cable terminals and controller rating
    Lights at the end are dimVoltage drop across a long cable or LED stripCable length, conductor size, branch layout and power injection
    Driver repeatedly turns offOverload, short circuit or over-temperature protectionTotal wattage, output wiring, ventilation and ambient temperature
    Touch dimming is unstableIncompatible controller, driver or lighting loadVoltage, PWM compatibility, minimum load and sensor wiring
    Wireless controls do not respondReceiver pairing, communication distance or power problemPairing procedure, receiver voltage, signal obstructions and transmitter battery
    Connectors become hotExcessive current, loose connection or undersized connectorPort current, connector rating, terminal condition and load distribution
    Lights show camera bandingPWM frequency conflicts with camera settingsController frequency, shutter speed and project filming requirements

    LED Driver Selection Checklist

    Before ordering a cabinet lighting power supply, confirm the following information:

    • Input voltage and frequency

    • Required 12V or 24V DC output

    • Total connected lighting wattage

    • Required capacity margin

    • Maximum current per output port

    • Number of fixture ports

    • Required switch or controller port

    • Single-color or tunable-white lighting

    • Required dimming method

    • Sensor and controller compatibility

    • Longest cable distance

    • Cable and connector specifications

    • Driver installation space

    • Ambient temperature and ventilation

    • Indoor, humid or protected installation environment

    • Target market and certification requirements

    • Plug type and power cord length

    • Packaging, labeling and OEM requirements

    Recommended Voltage by Cabinet Application

    ApplicationPossible Voltage ChoiceMain Consideration
    Small display cabinet12V or 24VUse the voltage required by the selected spotlights or shelf lights
    Single kitchen wall cabinet12V or 24VBoth can work when the cable distance and load are short
    Full kitchen cabinet system24V often preferredLonger cable routes and several lighting branches
    Long wardrobe lighting24V often preferredReduced current and more consistent brightness over distance
    Drawer lighting12V or 24VFollow the selected compact light and sensor platform
    Walk-in wardrobe24V often preferredMultiple lighting zones and longer cable distribution
    Retail display wall24V often preferredLong linear runs and consistent presentation lighting
    Compact battery-powered furnitureApplication-specificThe battery, charging system and lights must be designed as one platform

    Questions to Ask an LED Driver Supplier

    • Is this driver designed for constant-voltage cabinet lighting?

    • Which 12V and 24V output options are available?

    • What are the available wattage configurations?

    • What capacity margin is recommended for this model?

    • What is the maximum current per fixture port?

    • Does the driver support PWM dimming?

    • Which sensors and controllers are compatible?

    • Does it support single-color and CCT cabinet lights?

    • What short-circuit, overload and temperature protections are included?

    • What is the operating temperature range?

    • What is the driver's IP rating?

    • What certifications are available for the target market?

    • Can the plug, cable, connector and output-port configuration be customized?

    • Can the supplier provide a wiring diagram and compatibility list?

    12V and 24V LED Driver FAQ

    Is 24V better than 12V for cabinet lighting?

    Neither voltage is automatically better for every project. A 24V system generally draws less current and is often more suitable for longer runs and larger cabinet systems. A 12V system can be practical for compact furniture, short cable distances and existing 12V product platforms.

    Can I use a 24V LED driver with a 12V cabinet light?

    No. Connecting a 12V light to a 24V driver can damage the LEDs and other components. The driver output voltage must match the rated voltage of the light.

    Can I use a 12V driver with a 24V LED light?

    No. A 24V light connected to a 12V driver may not operate correctly or may produce very low and unstable light output.

    How do I calculate LED driver wattage?

    Add the wattage of all connected cabinet lights and then include the capacity margin recommended for the driver. For many Artcilux cabinet power supply projects, a 20% to 30% reserve can be used as a general starting point.

    Why are the lights at the end of my cabinet run dimmer?

    The most likely cause is voltage drop caused by cable length, high current, small conductors, long LED strips or connector resistance. Shorter parallel branches, suitable cable sizing, power injection or a compatible 24V system may reduce the problem.

    Can one LED driver power several cabinet lights?

    Yes. One constant-voltage driver can power several compatible cabinet lights when the total wattage, output-port current, connector rating and controller capacity remain within their specified limits.

    Does every LED driver support dimming?

    No. The driver or downstream controller must explicitly support the required dimming method. Non-dimmable drivers should not be connected to an incompatible AC wall dimmer.

    Can I hide an LED driver inside a cabinet?

    A driver can be concealed in an appropriate furniture compartment, but it should remain accessible for inspection and replacement. Its ventilation, clearance and environmental requirements must also be followed.

    Is low-voltage cabinet lighting automatically safe?

    Low-voltage operation can reduce certain electrical risks, but it does not eliminate the need for a correctly rated driver, suitable cables, protection functions, compliant mains wiring and proper installation.

    Choose a Cabinet LED Driver with Artcilux

    Choosing between a 12V and 24V LED driver requires more than checking the voltage printed on the light. The complete decision should include total wattage, load margin, cable distance, voltage drop, dimming method, output ports, sensors, controllers, installation space and target-market safety requirements.

    Artcilux supplies smart cabinet power supplies, LED lights, sensor switches, wireless controllers and connection accessories for integrated furniture lighting systems. Available power supply options include ultra-thin structures, multiple output ports, 12V and 24V configurations and project-based wattage selection.

    For a power supply recommendation, provide the lighting product list, voltage, wattage per fixture, quantity, cable distance, control method, cabinet drawing, target country and required certification. Contact Artcilux for a cabinet LED driver compatibility evaluation and quotation.

    References and Further Reading

    References
    PREV: No information
    Our News
    ARTCILUX Updates
    12V vs 24V LED Driver for Cabinet Lighting: Wattage, Voltage Drop, Dimming and Safety
    2026.07.23
    For most cabinet lighting projects, a 12V LED driver is suitable for compact furniture, short cable distances and lighting products already designed around a 12V platform. A 24V LED driver is often th...
    Cabinet Lighting Installation Guide: Wiring, LED Drivers, Sensors and Profile Placement
    2026.07.23
    Successful cabinet lighting installation starts before the cabinets reach the jobsite. The lighting type, profile position, cable route, LED driver capacity, sensor location and maintenance access sho...
    What Is an Integrated Cabinet Lighting System?
    2026.06.30
    An integrated cabinet lighting system is not one product.It is a group of products working together.It usually includes:LED lighting fixturesPower suppliesSensorsSwitchesControllersConnectorsCablesAlu...
    At Artcilux, we believe furniture is more than storage.
    2026.06.30
    A cabinet can be a product.A wardrobe can be an experience.A display unit can be a stage.A millwork project can be a masterpiece.Lighting helps people see the value inside the work.That is why Artcilu...
    INQUIRE BASKET(0)
    Empty
    Inquires
    We use cookies to offer you a better browsing experience, analyze site traffic and personalize content. Part of the tracking is necessary to ensure SEO effectiveness,
    By using this site, you agree to our use of cookies. Visit our cookie policy to learn more.
    Reject Accept